


A video background refers to a video clip or footage that is used as the background of a website. It is often used to enhance the visual appeal of the content and to create an immersive experience for the viewer. We will go over how to create a video background with HTML and CSS in this tutorial. A GitHub repo has been provided with the starter files and full source code. You can also check out the live version:

Prerequisites
This tutorial assumes that you have a basic knowledge of HTML and CSS.
Why video background?
Video backgrounds can create an eye-catching and immersive user experience. They allow you to showcase high-quality visual content and set the mood or tone for your website. When the correct video is used, a video background is an easy yet effective approach to distinguish your website from the billions of other websites online.
Getting Started
We will use the following to create our video background:
videoHTML element.sourceHTML element.CSS styling.
Video HTML Element
The <video> HTML element embeds a media player which supports video playback into the document.
To create the video background, we add a <video> element in the HTML with the playsinline, autoplay, loop, and muted attributes.
<header>
    <video playsinline autoplay loop muted>
    </video>
</header>
Each of the video attributes plays a role in making the background video work:
playsinlinemakes the video play on iOS.autoplaymakes sure that the video starts playing as soon as the page loads.loopenables the video to play continuously without stopping.mutedremoves the video sound.
💡 Note: We didn't include control attributes because we don't want our users to be able to control our video. That is, we don't want them to play/pause our video.
Our screen shouldn't display any video at this point:

Source HTML element
The source element will be used to provide multiple resources for our video element. This means that we can provide different formats(.mp4, .webm, and .ogg) of our video.
A video with different formats has been provided in the GitHub repo.
<header>
  <video playsinline autoplay loop muted>
    <source src="./videos/jellyfish.mp4" type="video/mp4" />
    <source src="./videos/jellyfish.webm" type="video/webm" />
    <source src="./videos/jellyfish.ogg" type="video/ogg" />
  </video>
</header>
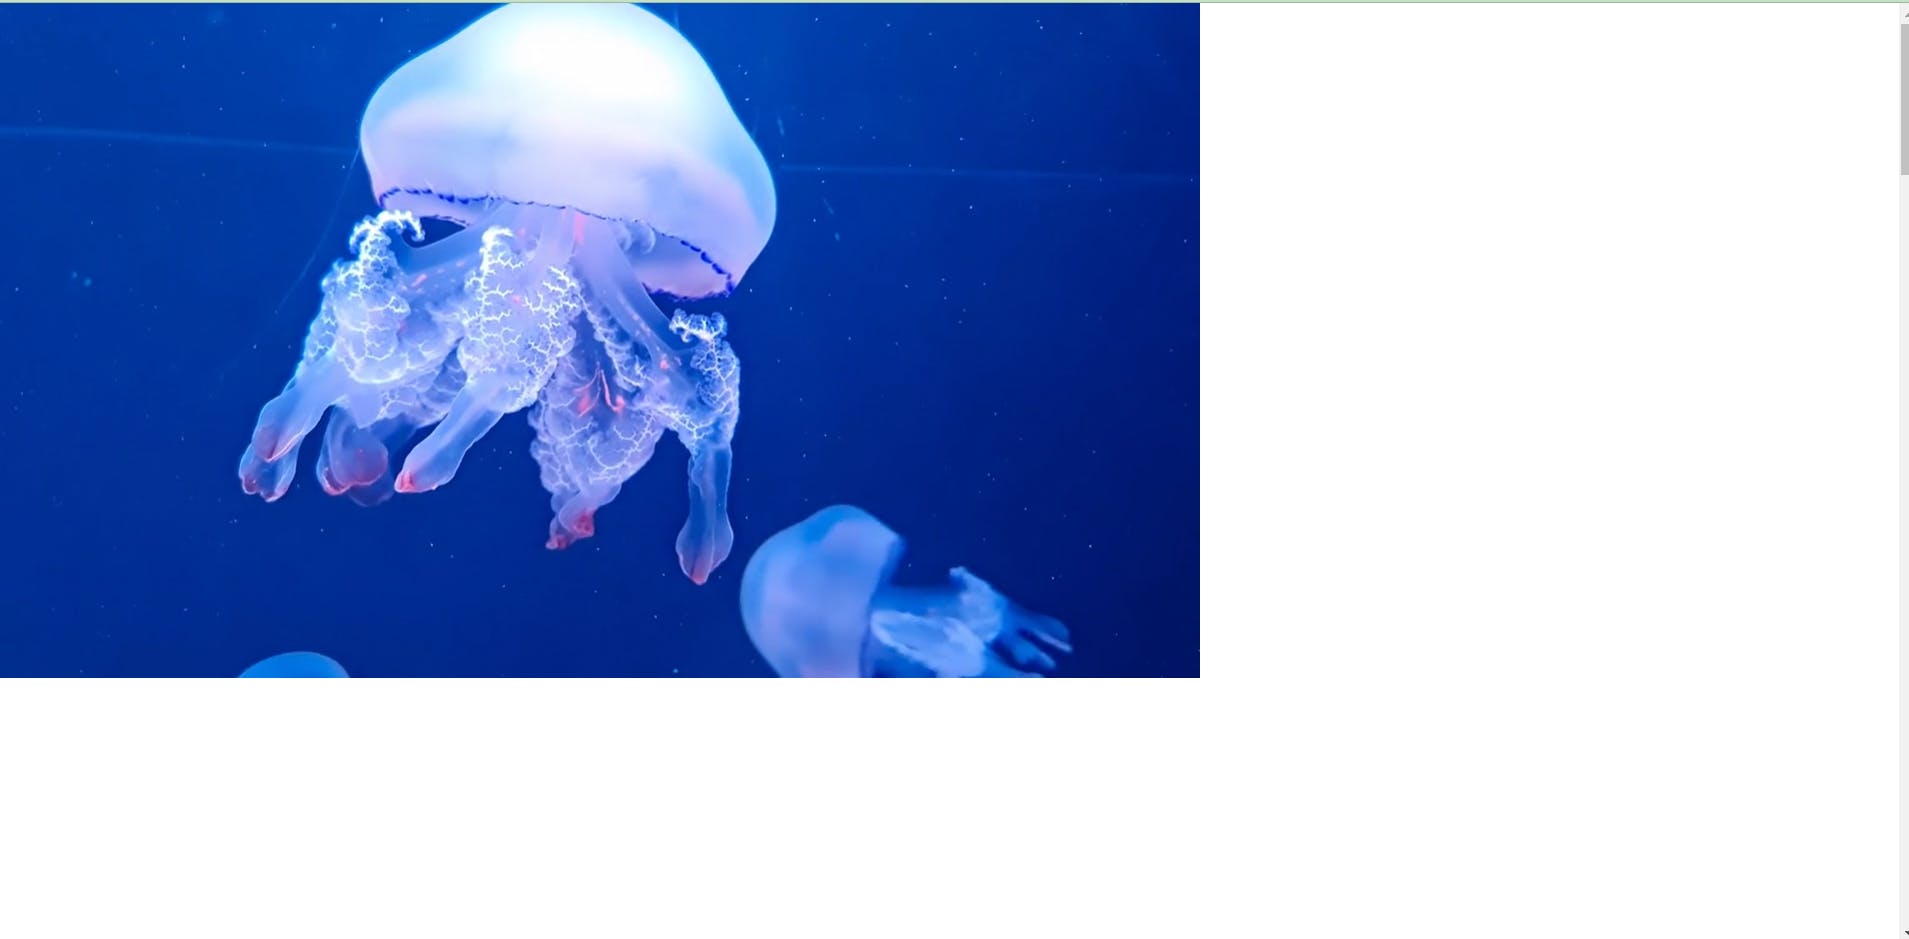
Our screen should display the background of our video at this point:
Styling the video with CSS
There are different ways to style our video background. We can decide to make it a full-page video background or just a section of our website. We will look at the latter in this article.
Go ahead and add a class of cont and video to the header and video element respectively. Some CSS properties will be given to the header to make our styling possible:
relative positionenables us to control where to place the video.fixed heightconstraints the height of the video.
.cont {
  position: relative;
  height: 85vh;
}
Our video element will have the following CSS properties:
positionplaces the video inside the header.top & leftsets the vertical and horizontal position.width&heightset the dimensions.object-fitsets how the video should be resized to fit its container(<header>).z-indexplaces the video behind theheadercontent.
.video {
  position: absolute;
  top: 0;
  left: 0;
  width: 100%;
  height: 100%;
  object-fit: cover;
  z-index: -1;
}
Our screen should have a fully styled video background at this point:

Now that our video background is prepared, how about adding some content to it? Let’s go ahead and add our header title.
Adding content to the video background
We‘ve set our video into place. Now we can add whatever content we want on top of it. Let’s add a title like so:
<header class="cont">
  <video class="video" playsinline autoplay loop muted>
    # ....
  </video>

  <h1 class="h1">Welcome to my website.</h1>
</header>
Then go ahead and update our CSS:
.cont {
  /* add this */
  display: flex;
  align-items: center;
  justify-content: center;
}

.h1 {
  color: #fff;
  font-size: 5rem;
}
We can even make the visibility of the title better by adding an overlay:
<header class=”cont”>
  <video playsinline autoplay loop muted>
    # ....
  </video>

  <div class="overlay"></div>
  <h1 class="h1">Welcome to my website.</h1>
</header>
Our CSS should be updated like so:
.video {
  z-index: -2;
}

.overlay {
  position: absolute;
  top: 0;
  left: 0;
  width: 100%;
  height: 100%;
  background: rgba(0, 0, 0, 0.5);
  z-index: -1;
}
Our screen should have the content on the video background at this point:

Conclusion
Video backgrounds are a versatile tool for web design. With some creativity, you can achieve unique results that align with your brand and goals. Have fun with it!
To summarize, here are the main steps to create a video background:
Add a
<video>element to your HTML with the necessary attributes (autoplay,loop,muted).Include
<source>elements to provide video files in multiple formats (mp4, webm, ogg).Style the video with CSS (
position,dimensions,object-fit,z-index).Add content on top of the video and style it as needed.
Consider adding an overlay to improve text visibility.
You can even take it further by:
adding a poster attribute to the video.
making the background a full page.
Overall, video backgrounds are an impactful way to enhance your website and leave a lasting first impression on visitors. With some experimentation, you can create unique results that are tailored to your brand and goals. Have fun with it!